Manual Firmware Update
Overview
New features are regularly added to your Yardian, and these updates may require firmware updates. You can easily start the firmware update in the app via the OTA (over-the-air) update mechanism.
However, if you encounter a Wi-Fi connection issue, performing a manual update is necessary. You can update the firmware manually using either an Ethernet cable or a USB drive.
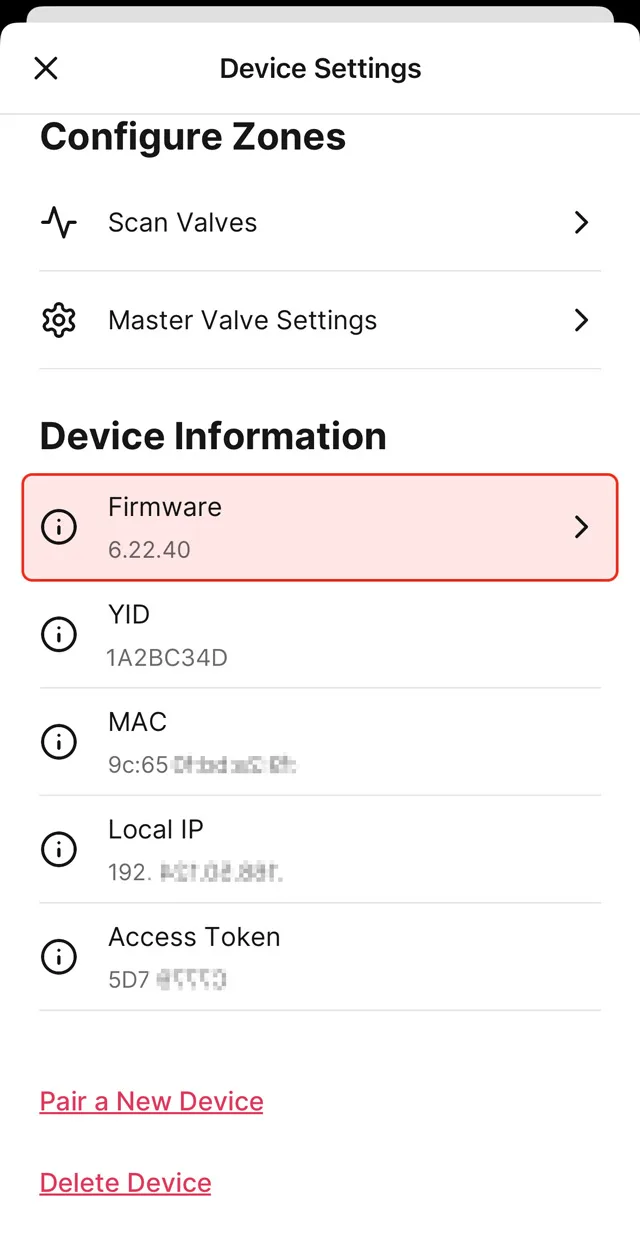
Check Your Firmware Version
Please go to the “Device Settings” page, then you can find your firmware version.
Manual Firmware Update Using An Ethernet Cable
The following steps should guide you through updating the Yardian’s firmware using an Ethernet cable connection to your Wi-Fi router:
Relocate Yardian:
Move the Yardian closer to your Wi-Fi router and connect it using an Ethernet cable.LED Confirmation:
Once connected, the LED indicator should display a steady blue light, indicating a successful connection to our server.App Verification:
Open the Yardian app on your device. The app should detect and display the Yardian as online.Navigate to Firmware Update:
- Go to the Main tab within the Yardian app.
- Click on the Device Settings card (the first card on the page).
- Locate and select the Firmware section.
Initiate Firmware Update:
Within the Firmware section, initiate the firmware update by following the provided prompts.Wait for Update: Allow the system sufficient time to complete the update process. While updating, the main LED will cycle through green, blue, and red. It’s crucial NOT to turn off the power during this process. Wait for the system to reboot and for the LED indicator to return to a steady blue light.
Manual Firmware Update Using A USB Drive
Prepare The USB Drive
For the USB drive, FAT32 format is required. The size should be less than or equal to 8GB.
Please download the zip file.
Unzip the downloaded zip file and save the firmware file(s) in a USB drive.
⚠️ Please DO NOT put them in any folder.
Update firmware for Yardian Pro
Insert the USB drive, then press the Reboot button.
Press and hold both the Select and Run/Stop buttons immediately when the LED turns Red.
Release the buttons once the LED turns Blue.
The LED will cycle through colors (Red → Blue → Green) during the installation.
⚠️ Please DO NOT turn off the power during this process.
The system will reboot automatically once the update is complete. You may remove the USB drive once the LED is no longer Red.
Update firmware for Yardian (with camera)
Prepare the Device: Unplug the Yardian power cord and remove the Wi-Fi dongle from the USB port.
Verify Port: Ensure the USB port is completely empty.
Initiate Update: Replug the Yardian power cord and wait until the LED starts blinking slowly in Red.
Insert USB: Once the slow red blink appears, insert the USB drive. The LED will begin blinking quickly in Red, indicating the firmware is updating.
⚠️ IMPORTANT: Please DO NOT turn off the power during this process.
Completion: The LED will turn Solid Purple once the update is complete.
Finalize: Unplug the Yardian, reinsert the Wi-Fi dongle, and replug the power cord to restart the system.