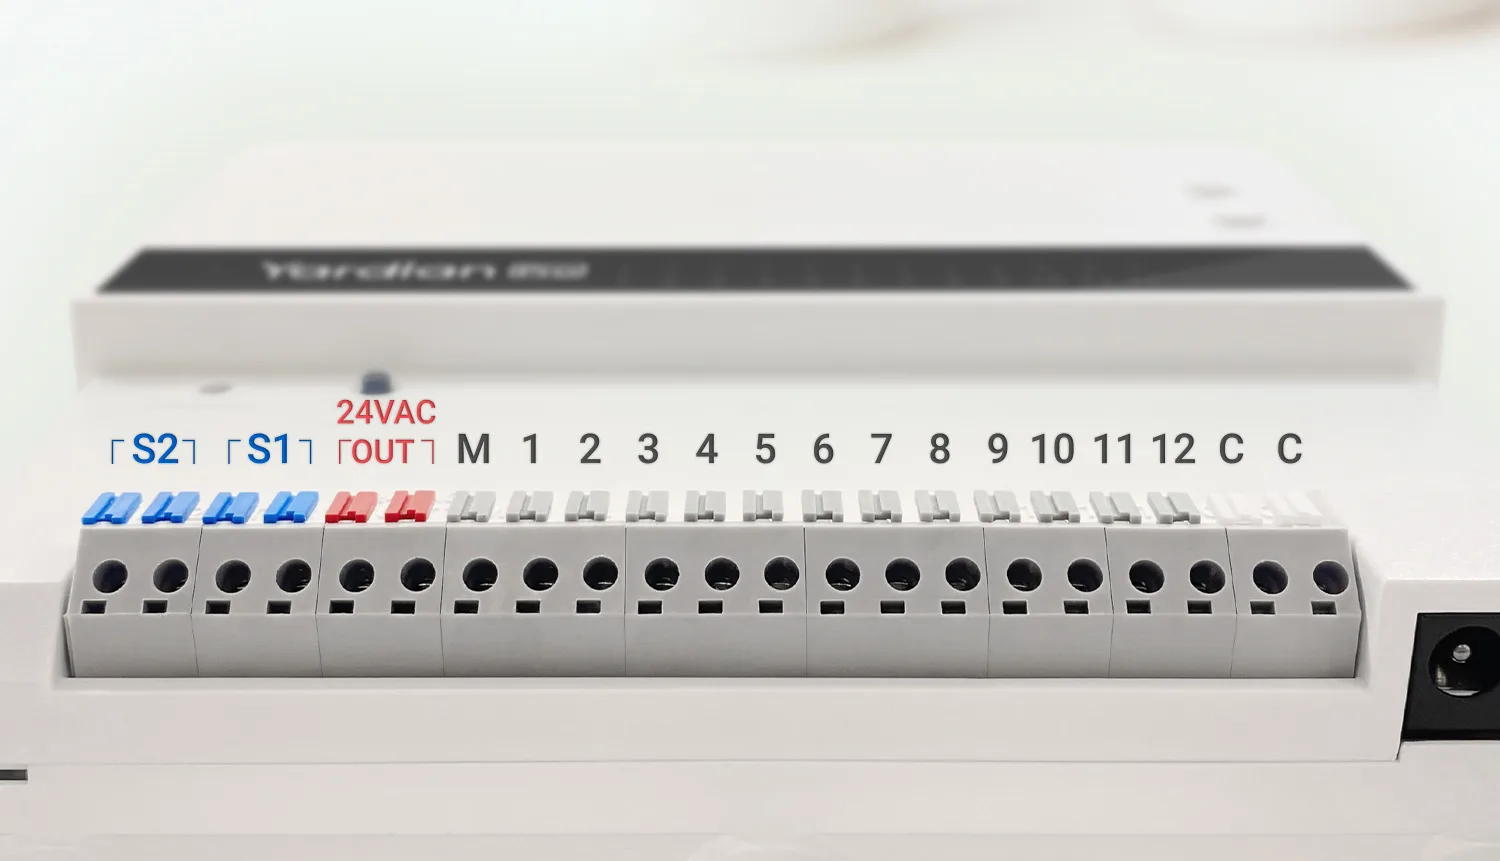
The Yardian Pro offers two sensor terminals (S1 and S2) and a 24VAC power supply (red terminals) for the wireless sensor receiver. If you are utilizing a wireless rain sensor, please verify that your rain sensor’s receiver is compatible with a 24VAC power supply.
Follow these steps to properly install your rain sensor or wireless rain sensor receiver:
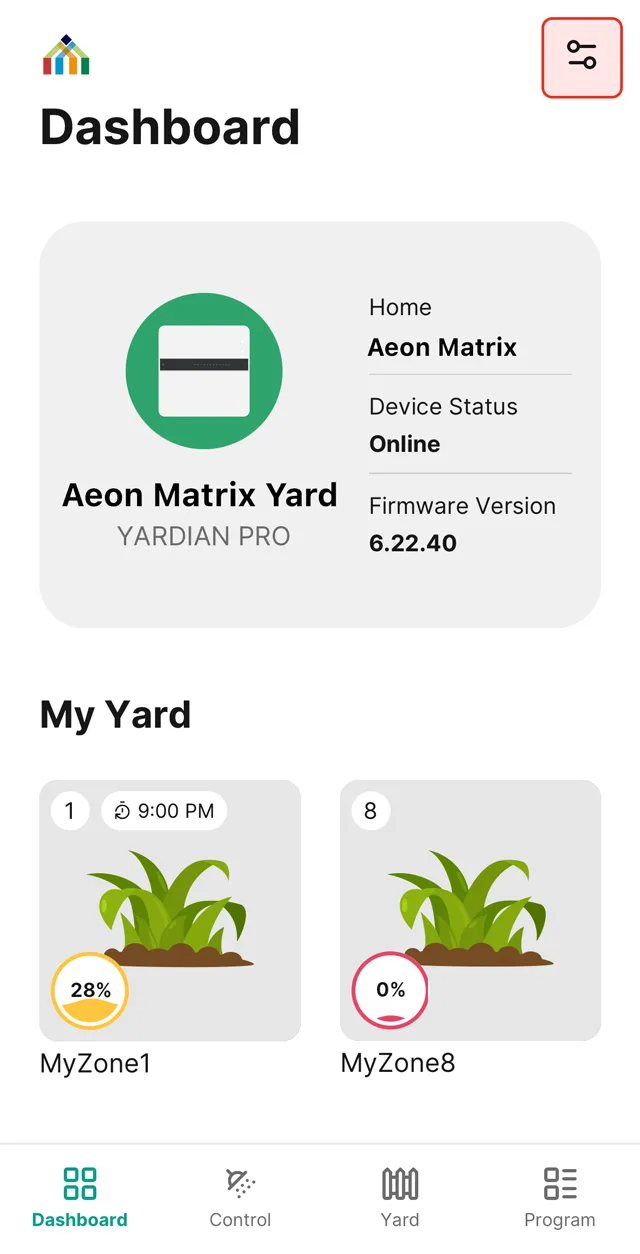
1. Go to the Yardian Device Settings:
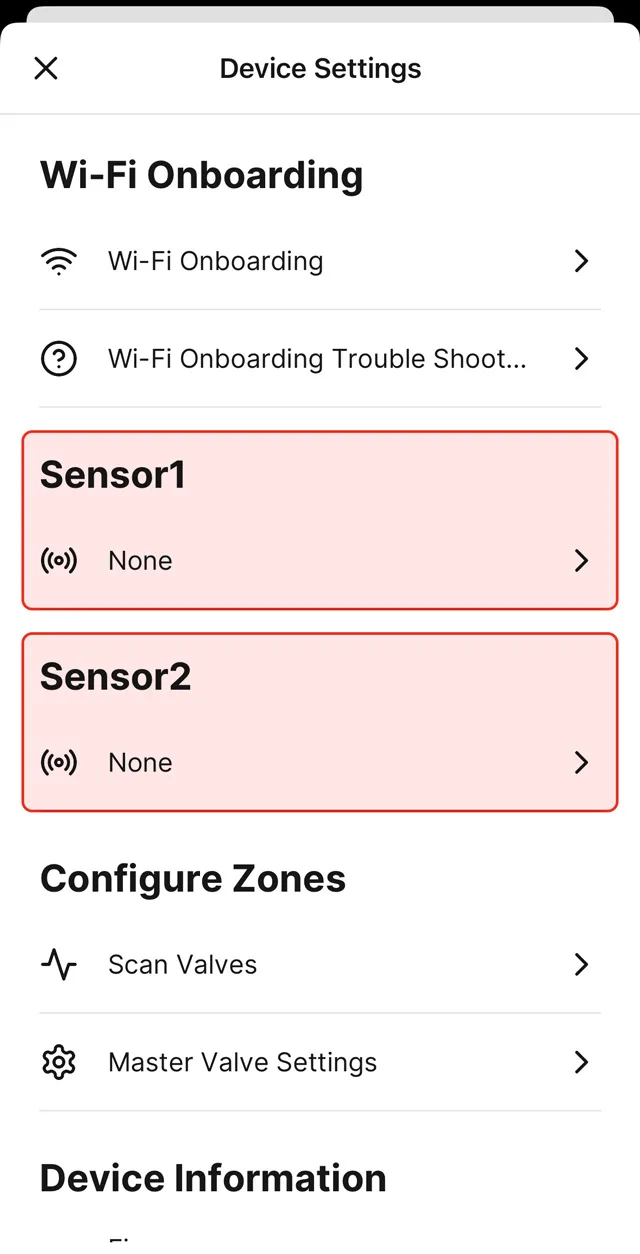
2. Select S1 or S2 according to the wirings above.
Please ensure that the choice of S1 or S2 terminal corresponds to the app setting
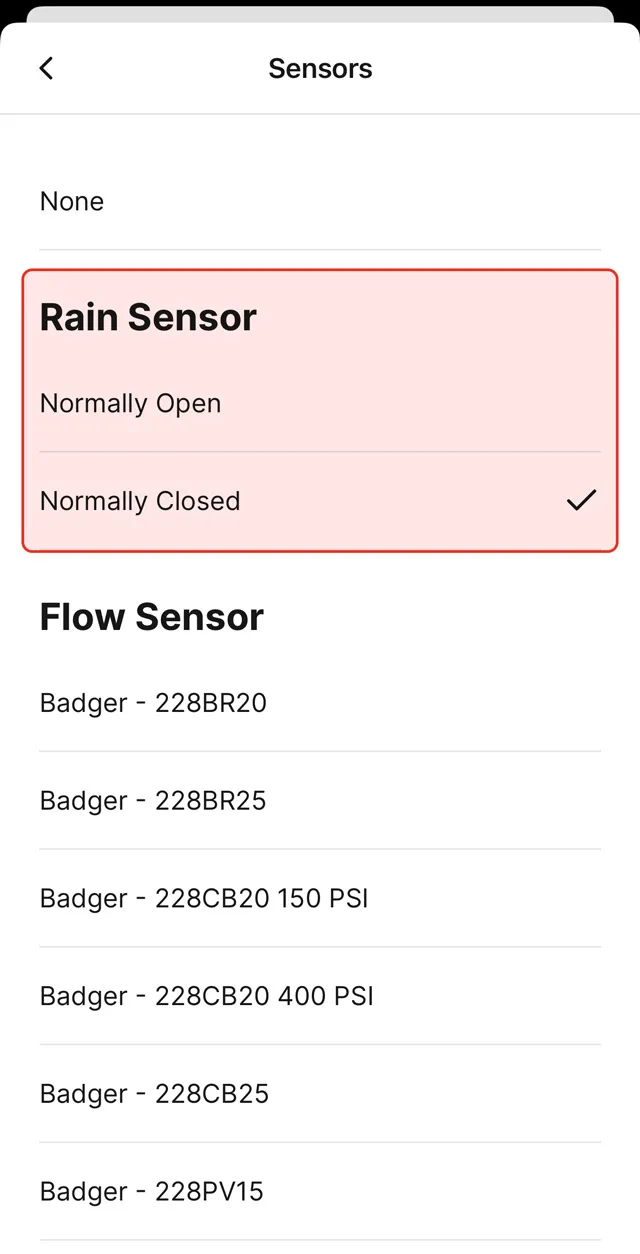
3. Specify the type of your rain sensor – Normally Closed (more common) or Normally Open.
※ The wirings of the Normally Closed sensor (more common) and Normally Open sensor may be different. Various brands may also differ. Please check the instructions of your wireless rain sensor.
4. Go to the Control tab and run a zone instantly for testing.
| Cookie | Duration | Description |
|---|---|---|
| cookielawinfo-checkbox-analytics | 11 months | This cookie is set by GDPR Cookie Consent plugin. The cookie is used to store the user consent for the cookies in the category "Analytics". |
| cookielawinfo-checkbox-functional | 11 months | The cookie is set by GDPR cookie consent to record the user consent for the cookies in the category "Functional". |
| cookielawinfo-checkbox-necessary | 11 months | This cookie is set by GDPR Cookie Consent plugin. The cookies is used to store the user consent for the cookies in the category "Necessary". |
| cookielawinfo-checkbox-others | 11 months | This cookie is set by GDPR Cookie Consent plugin. The cookie is used to store the user consent for the cookies in the category "Other. |
| cookielawinfo-checkbox-performance | 11 months | This cookie is set by GDPR Cookie Consent plugin. The cookie is used to store the user consent for the cookies in the category "Performance". |
| viewed_cookie_policy | 11 months | The cookie is set by the GDPR Cookie Consent plugin and is used to store whether or not user has consented to the use of cookies. It does not store any personal data. |